Tips and tricks for a successful vehicle wrap.
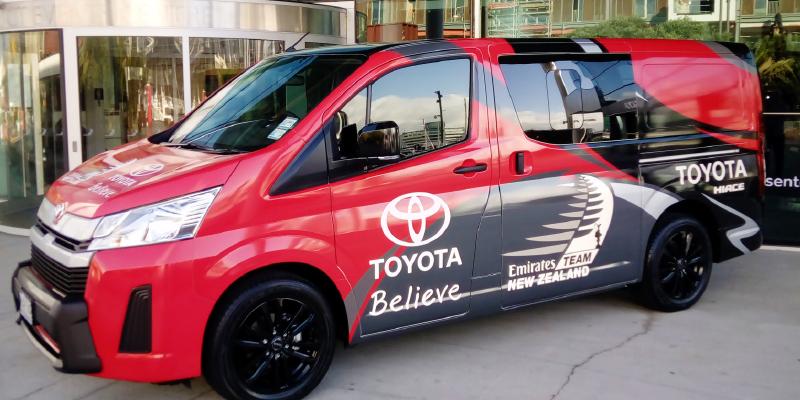
For most of our readers, the idea of wrapping a vehicle makes sense, especially when you are looking for the solution of how best to promote your business to the widest possible audience.
While the actual organisation of vehicle wrapping might well be relegated to your fleet manager or possibly your lease company of choice, it is important to understand the processes involved, if only to ensure the wrapping is being done properly and professionally.
As with any form of cosmetic improvements, preparation and cleaning are critical. About 90 percent of wrap failures are due to lack of preparation, with cleaning being the main part of the process not carried out thoroughly enough.
A wrap won’t stick to dirt or imaginary/missing car parts, but it will stick very well to poorly adhered paint, bubbling paint and rust bubbles.
In fact, it can rip off poorly prepared paintwork, which not only means a damaged paint job, but you’ll need to use more materials to replace that section contaminated by the paint.
A reputable vehicle wrapping firm should go over the pre-wrap paint inspection as a matter of course, but if you are aware of any previous paint repair work, point it out.
Furthermore, it is important to note that paint needs time to cure – in the case of automotive paintwork, bank on 30 days after paint has been applied before attempting to wrap.
We all like shiny, polished vehicles, however wax is bad for wraps and must be removed.
Vehicles will need a wash with hot soapy water thoroughly, concentrating on high dirt areas such as under sills around wheel arches and in recessed areas of the body work, with NO wax or polish applied afterwards.
Water will help remove any organic contamination such as dirt dust, animal manure, road grime, bugs, etc. Alcohol-based substances will not remove natural residues.
The vehicle must then be checked for tar on the paintwork, predominantly around wheel arches and on the lower sills and bottom of doors. If tar is evident, then soapy water will not remove this, you will need to wash this area down with mineral turpentine.
Tip: Make sure the vehicle is completely dry before moving on, pay particular attention to door channel recesses and around and under rubbers when drying.
Removal of hardware such as door handles, lights and any badges, is advised to give a neater finish to the wrap. By removing these there will be no seam and no patching required and will help make the wrap look like it was painted on.
To assist in the removal of badges, pour boiling water liberally over the badges, this will soften the adhesive tape and allow for easier removal. The tape will usually be left behind and soaking the adhesive with turpentine will help remove the adhesive and tape residue.
Tip: A plastic blade scraper or vinyl applicator can also be used in removal of stubborn tape and adhesive.
Don’t wrap over existing graphics or adhesive, this is bad wrapping and it will show. Vinyl removal can be a lengthy process but must be done for a professional finish.
To identify areas of remaining adhesive, a paper towel works well. Wipe the towel over the area, fibres from the paper towel will stick to any adhesive residue, so reapply process until it has been removed.
The final, stage is to completely wash the vehicle from top to bottom with ISOPROPYL ALCOHOL, commonly known as IPA – this will remove dust or any oil/wax-based residue. Lint free rags should be used to apply and clean with the IPA and also to dry the surface.
Tip: Don’t forget when using an adhesive remover, clean the area afterwards with IPA as it usually leave a corrosive and oily residue.
Watch for hazing on cold days and remove any haze with a dry clean cloth, paying particular attention to concave areas and tight recesses. Once these are clean... clean them again.
Attention to detail is extremely important when it comes to prepping tight curves and recessed areas. Wraps can be prone to lifting on tight curves, edges, seams and along deep grooves in vehicles, concave and convex areas.
Areas around the wheels where water or mud are constantly blasted against the vinyl can also be potential problems if not wrapped well.
What separates a good sign maker from a cowboy firm? The NZ Sign and Display Association values of quality, integrity and service are practiced with all their active members whom proudly display the sign of quality within their businesses, and by doing so, their customers trust their knowledge and experience as a sign maker.

